Lesson 1
Begin coding with XRPL
Introducing the XRPL.js library and the XRPL testnet

Create an account on the XRPL testnet
When coding on the XRP Ledger, you’ll be able to try out your code using the testnet servers. These servers have all the same functionality as our livenet ledger, but without real XRP or currency. Just like the code in this tutorial, when you start building your own app on the XRPL, you’ll want to build everything to interact with the testnet to experiment and test your code. Try creating a wallet on the testnet using this code example below! Once the wallet is created, you can use the generated credentials to access it.
Use the Token Test Harness HTML files to transfer XRP between two accounts
The XRP ledger (XRPL) is a robust, secure, customizable blockchain. You can create your own interface to try out the capabilities and support your specific business needs.
In the next lesson, you can edit and try out the Test Harness HTML and JavaScript files in a code sandbox or download the files to your computer. Each part of the tutorial includes one JavaScript file containing functions using the XRPL.js library and one HTML file containing form fields and buttons which interact with the JavaScript functions. The harness displays two accounts at once, so that you can transfer assets from one account to the other and see the results in real time. The image below shows the Token Test Harness at the completion of the tutorial.
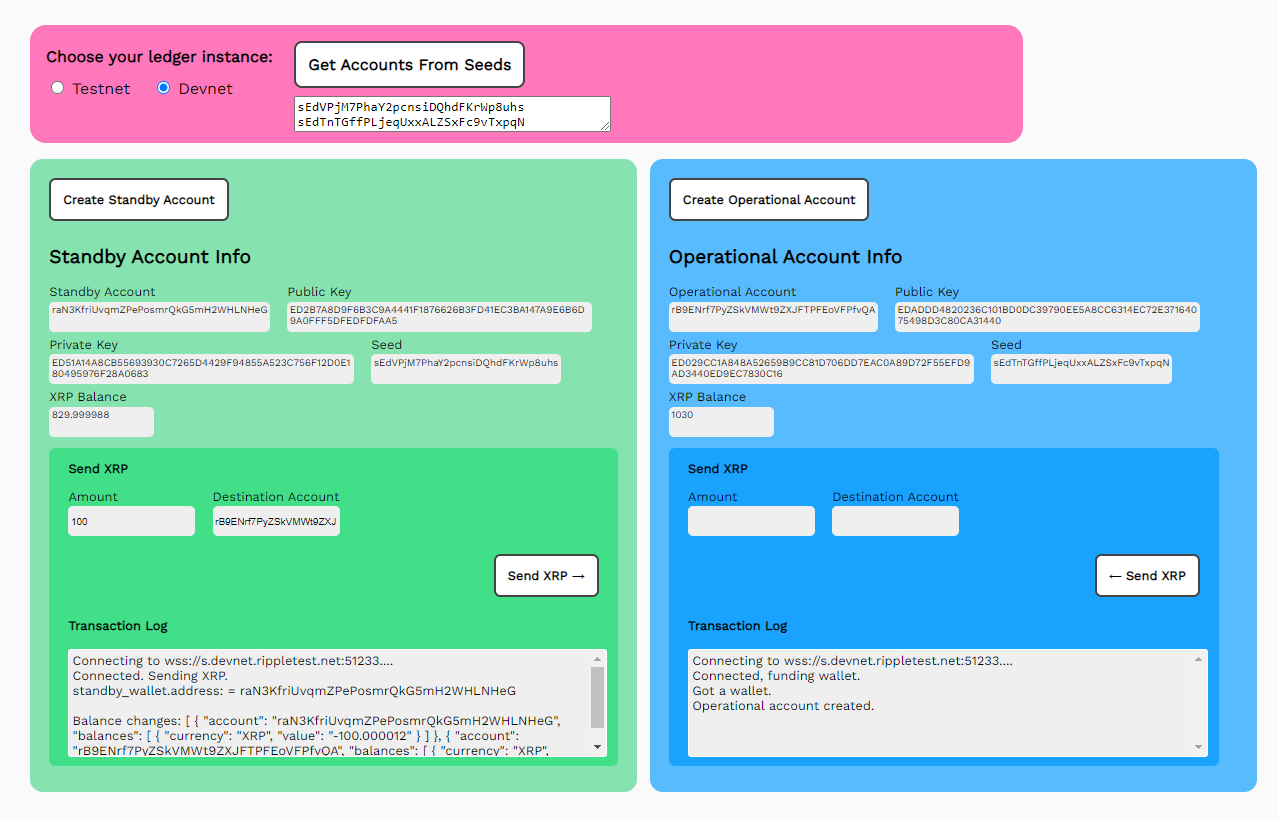
That is a lot of fields and buttons, all working together to perform some significant practical tasks. But rest assured, getting started with the XRPL is not that complicated.
Interacting with the XRPL typically involves four steps:
- Connect to the XRPL and instantiate your wallet.
- Make changes to the XRPL using transactions.
- Get the state of accounts and tokens on the XRPL using requests.
- Disconnect from the XRPL.
Each lesson in this course shows you how to build the Token Test Harness one section at a time. Each section lets you try out meaningful interactions with the test ledger, with a complete JavaScript/HTML code sample and code walkthrough. There is also a link to the complete source code for each section that can be modified with a text editor and run in a browser. If you just cannot wait, you can jump to lesson 4 and try out the complete test harness right away.
Not all of the capabilities of the XRPL API are represented in this course. This example is not intended for production or secure payment use, but to introduce you to the API which can be used to implement features and capabilities of the XRPL.
Much of this is “brute force” code that sacrifices conciseness for readability. We anticipate that the applications you build will greatly improve upon these examples.